Talkie Library Makes Your Arduino Speak Like It’s 1985
September 19, 2022
Blog

Perhaps you remember the early voice synthesizers of the 1980s, which “spoke” in a muffled, marginally intelligible tone. Audio data storage was based on a linear predictive coding (LPC) format, and played back with a voice synthesis processor (VSP).
Texas Instruments’ Speak & Spell educational toy was perhaps the most iconic device that used this sort of technology, and if you’re nostalgic for this “soothing” voice, you can generate this type of speech using an Arduino and the Talkie library.
This library, which was first published in 2012 by Peter Knight, appears to now be updated and maintained by Armin Joachimsmeyer, linked here by Arduino. It takes LPC sound files, and uses an Arduino to act as the VSP. Long story short, load up “talkie” via the Arduino IDE’s library manager, program your Arduino with a provided example, and it’s ready to output sound via GPIO pins.

Caption: You’d better check that out!
Image Credit: Screencap
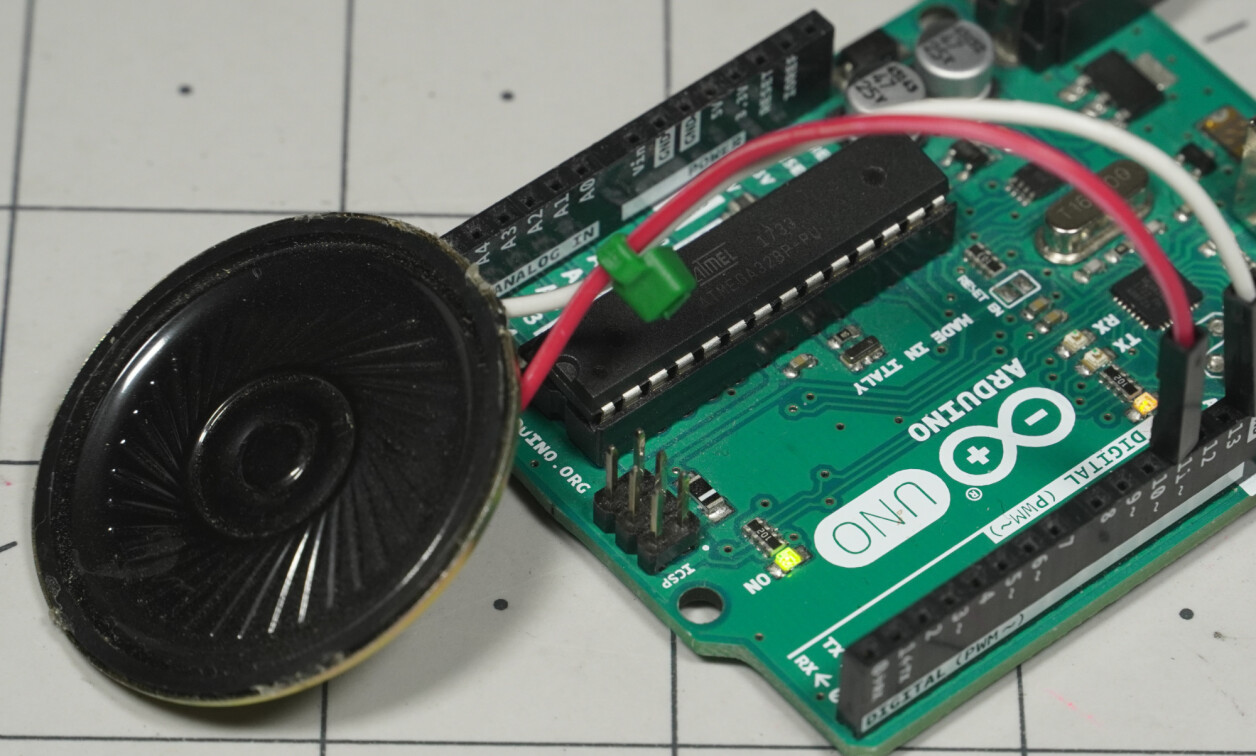
Assuming you’re using an Arduino Uno (other boards are also supported), connect a small speaker to a combination of pins 3, 11, and ground. 3 is the normal output and 11 is the inverted speech output, so if you hook both 3 and 11 up, the sound output will be greater than if you connect to one output and ground. Send the Getting_Started.ino sketch to your board and you’ll hear it say “danger danger red alert motor is on fire.”
This setup could hardly be simpler to use. Remember to use an actual speaker, not a buzzer. Either will output sound, but the buzzer quality will be much worse. You can also use an amplifier for additional volume, and there’s an optional filtering circuit to cut down on clicks and pops.
Rearrange, Say What You Want
Testing out Talkie library https://t.co/PF87wEr48C on @arduino Uno - quite impressive given the minimal hardware involved 🔊 @MicrochipMakes pic.twitter.com/bG8CRjJ4Jg
— Jeremy Cook 🤖 (@JeremySCook) September 1, 2022
If you examine the Getting_Started.ino file, you’ll note that clips are played in sequence via lines like voice.say(sp2_DANGER);. You can rearrange the sequence, but check out the Vocab_US_Large.h file found here to examine all the available clips in that speech package. Insert the appropriate variable from the header file, i.e. “sp5_TELEPHONE” or “sp3_ERROR” and it’ll speak whatever is stored therein.
Different vocabulary packages are available, which you can browse in the library’s source directory. If you find one that works better (or in addition) to Vocab_US_large, then include that as well or instead. You can also directly insert the hex values from the corresponding .cpp file, which could be convenient in some situations.
Custom Sound Clips

Caption: Custom sample recorded, converted, and pasted. Can also insert LPC data directly from libraries.
Image Credit: Screencap
Between the various vocabulary files, you have a large number of words from which to choose, but maybe there’s something else you’d like to say. Custom wording is entirely possible, though it will take a bit of finagling.
As outlined on the GitHub page, and in the video below (with a bit of background information on LPC and VSP), you’ll first need to record (or source) an audio clip. Convert it to the proper .wav format via this online converter (16 bit, 8000 Hertz). Then run it through either python_wizard, or BlueWizard on a Macintosh, to convert it to the proper LPC format. This will give you a series of hex values, which you can then insert directly into your Arduino code for playback.
Having tried this using BlueWizard, it’s a pretty approachable procedure, though you’ll want to play around with the settings to make sure what you say can still be heard. Also, be sure to check “include hex prefix (0x)” when using that software. While LPC playback leaves much to be desired from a quality perspective, the format does have a very cool retro sound, and can run on the humble Arduino Uno and similar boards without additional hardware.

Caption: BlueWizard
Image Credit: Screencap
Jeremy Cook is a freelance tech journalist and engineering consultant with over 10 years of factory automation experience. An avid maker and experimenter, you can follow him on Twitter, or see his electromechanical exploits on the Jeremy Cook YouTube Channel!


